 |
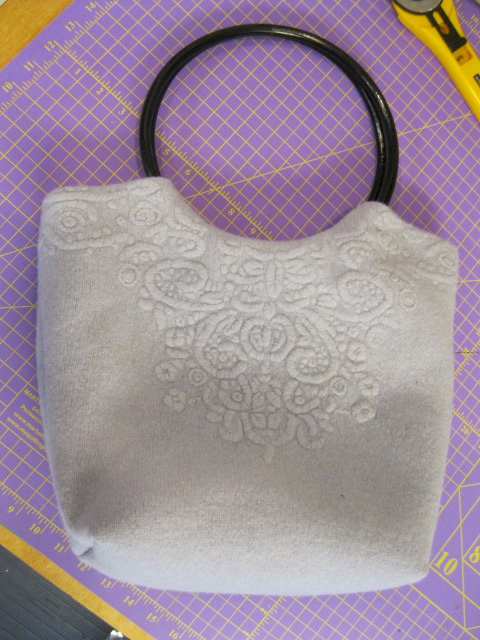
| The Finished Purse |
I wasn't sure exactly what to do next. Fortunately, members of my Critique Group Kathy and Margaret came to the rescue.
They had great ideas of how to
keep most of the original shape
as well as what kind of handles to use. I interfaced both the wool and the silk
lining with Pellon SF101 cotton interfacing. It seemed to have just the right amount of body for both items.
I think this would make a great knitting bag. (I don't knit!) Anyway, the party was yesterday and Karen Comstock of Quiltricks was the gift recipient! Karen is a knitter, so I hope she will enjoy this re-purposed sweater!
 |
| Felted Wool Sweater |
 |
| Sweater Front Ready to be Stitched Down |
 |
| Sweater Back After Adding Ribbing |
 |
| Bottom seam before adding interfacing |
 |
| Hand-Dyed Silk Lining With Interfacing |
 |
| Cutting Lining to Match Bag Shape |
 |
| Attaching Lining to Outer Bag |
 |
| Forming Bottom of Bag |
 |
| Attaching Lini |
If you are interested in trying this project here are a few steps to follow. You can use the photos to the right to find the captions to match up the pictures.
1. Find a wool sweater you would like to use. If it is not felted, wash it in HOT water and dry it in the hottest dryer temperature possible. This will help to shrink and felt the wool so it can be cut without unraveling.
2. Trim off the sleeves, a portion of the turtle neck and most of the ribbing on the bottom of the sweater.
3. If the front neck is curved, use a round or curved handle that is close to the same shape as the neckline of the sweater. This one was purchased at Joann's.
4. Cut away the side seams. Sew the front and back together at the bottom seam. Iron on interfacing.
5. Fold down the front neckline and shoulder seam so that no raw edges are showing on the outside. Hand stitch to the interfacing.
6. For the back curve, I trimmed the neckline to a similar curve and then had to clip the curve to get it to fold over the handle. I machine stitched leftover neck ribbing to the stretched out edge and then hand stitched it to the lining just like the front was attached.
7. Cut out lining using the purse as the pattern, allowing an inch for turning down the raw edges in finishing for later. (See picture)
8. Sew the side seams of both the purse. Cut out 2-1/2 or 3 inch squares at the bottom. Bring these two cut edges together in a straight line to stitch them to form the bottom of both sides. Repeat for the lining.
 |
| The Finished Purse! |